Cash receipts
Use the Cash Receipts screen to pay invoices and transfer money.
Tills
Use tills to take and track payments made in person.
| Users must first open a till to take payments. |
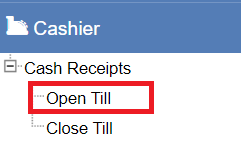
Opening a till
Before accessing the Cash Receipts screen, you must open a till.
You can open a till in one of two ways:
-
Navigate to .
-
Or from a
Case, click theFinancialsdropdown, then selectCash Receipts: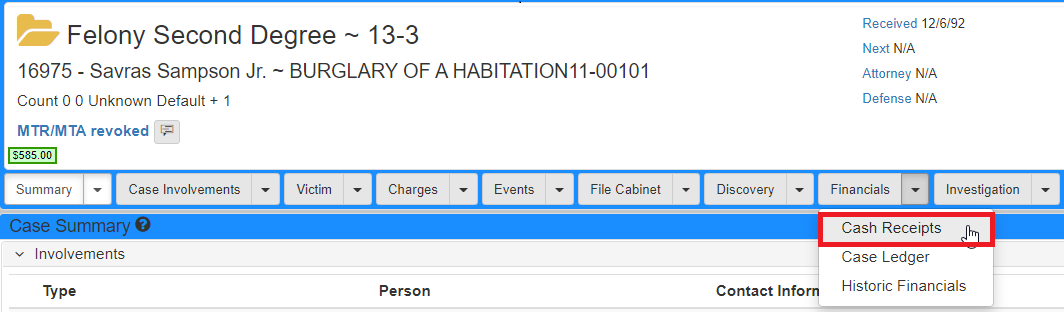
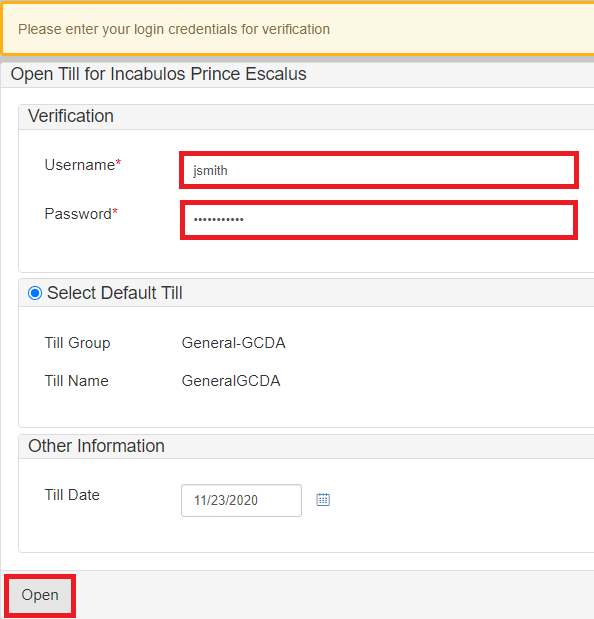
After selecting your option to open your till, you are prompted to open a till if it is the first time you have accessed Cash Receipts for the day.
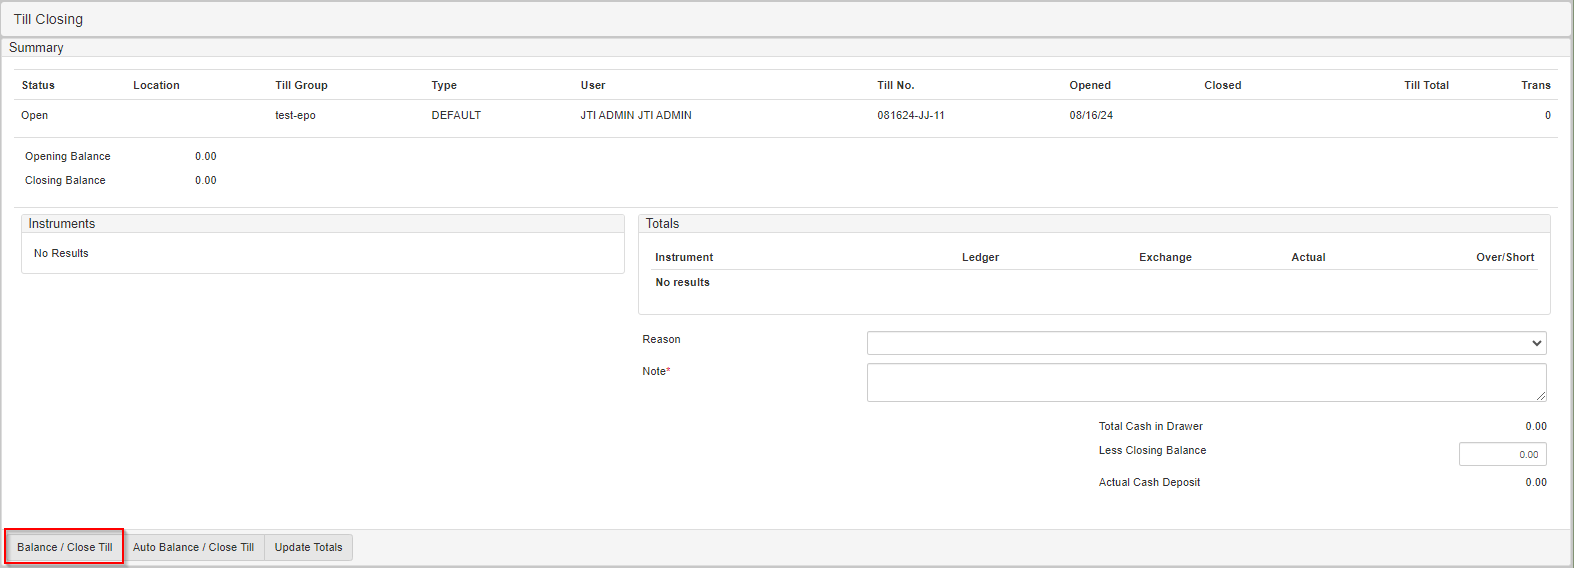
| If you have an unclosed till from a previous day, you are prompted to close that till before you can proceed. |
When you have an open till, your till number and a Cash Register icon show at the top of the screen:

Navigate the cash receipts screen
If you access Cash Receipts from a case, the screen shows the owed financials for that case.
Otherwise, you must to search for the case if you want to take payments for it.
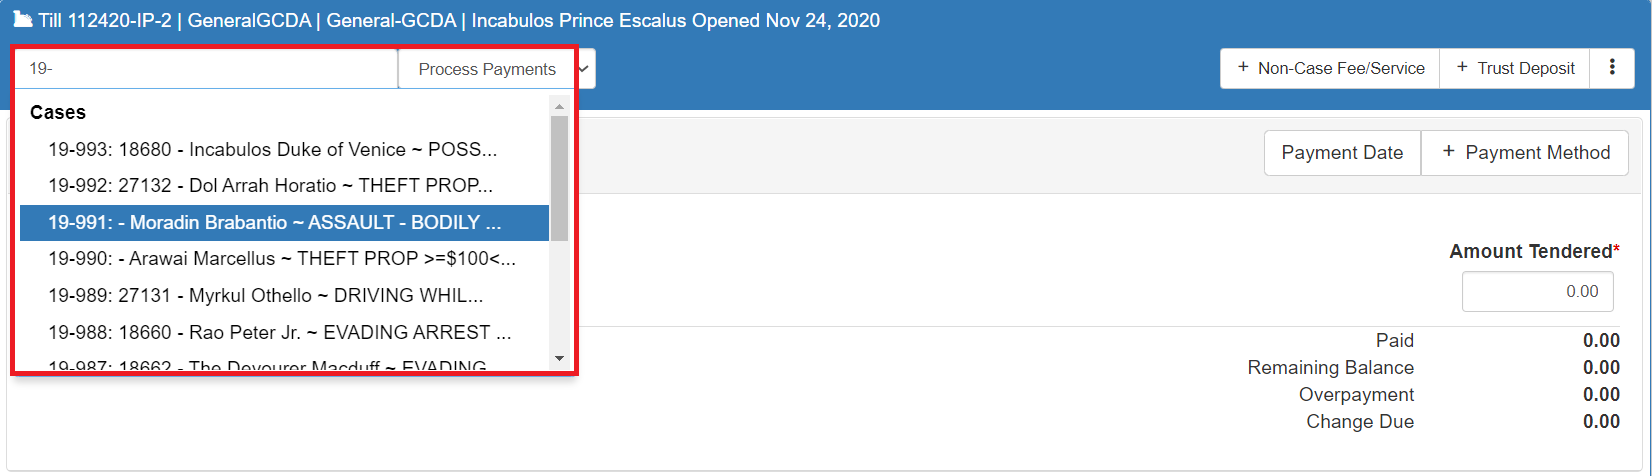
The Search Cases field in the Cash Receipts screen can be used to display a Case Assessment Detail panel.
By typing in the case number or name of the case, the search shows a list of cases:
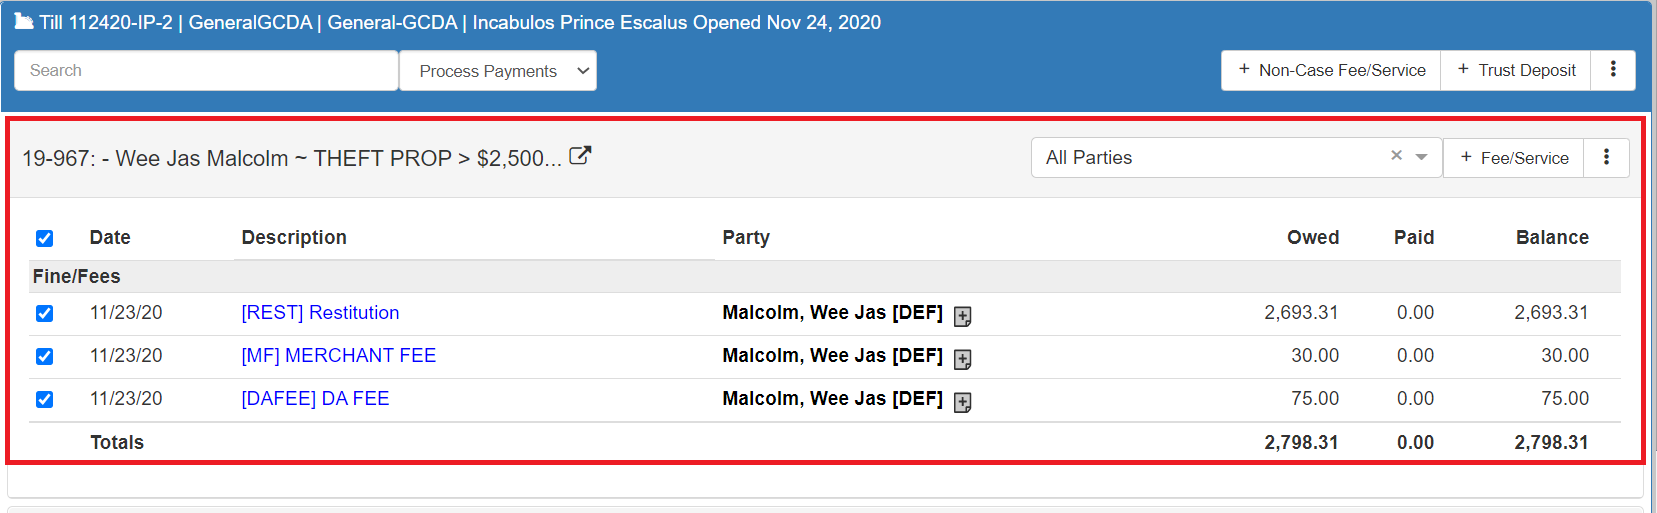
By choosing a case from the list, the Case Assessment Detail panel shows.
By searching and choosing another case, multiple panels can be shown.
A benefit of opening multiple cases is the ability to take payments over more than one case at once.
Switch till modes
Users that are taking mailed-in payments can switch their Till Mode in the Cash Receipts screen.
By default, tills are set to use the Counter mode.
The background color is blue and the top left icon shows a Cash Register icon.
This is part of core and cannot be customized.

If a user needs to record a payment made by mail, they click the Cash Register icon in the upper left corner of the Cash Receipts screen.
This changes the background color to yellow and replaces the Cash Register icon with an Envelope icon.
This option is only used if you must separate how you receive your payments and is not required to take payments.

Process payments
The Process Payments mode allows you to take payments and assess a fee, fine, or service.
The screen has three panels: Assessment Details, Payment Methods, and Payor Information:
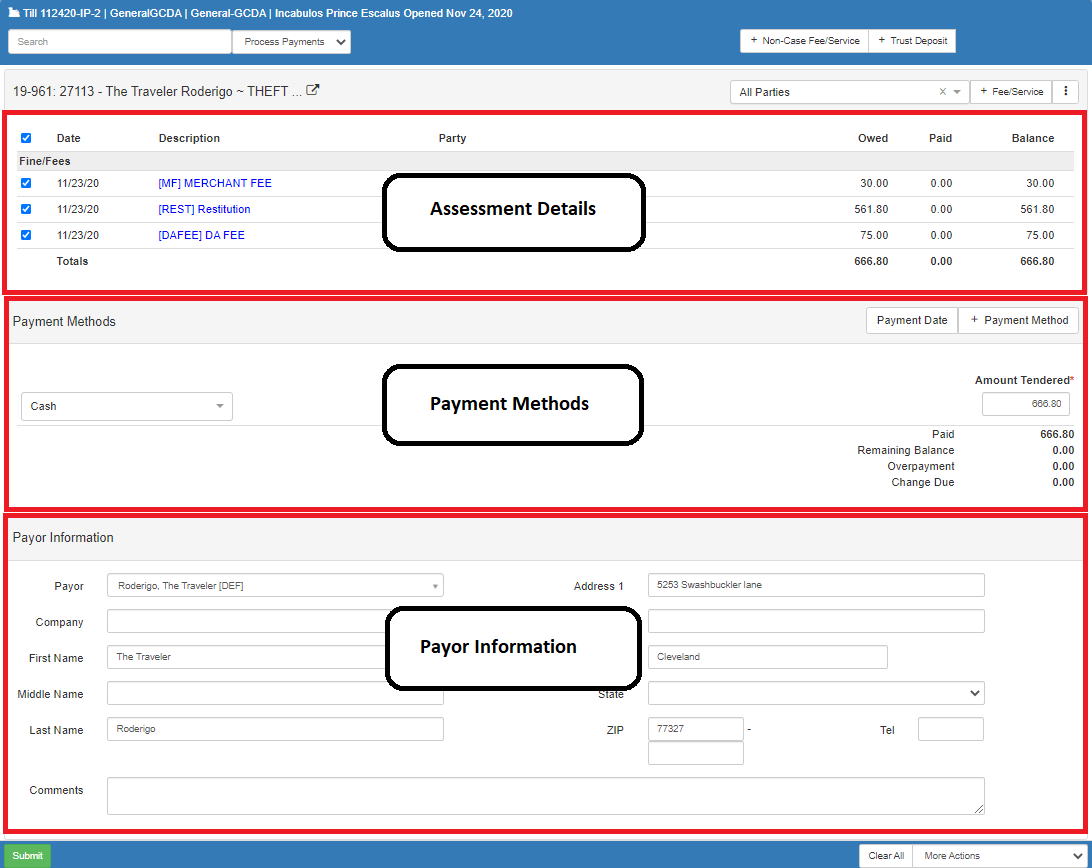
The Assessment Details panel shows fees, fines, or services assessed to the case.
It is also possible to show more than one case Assessment Details panel using the Case Search field.
The Payment Methods panel allows you to take payments on the items listed in the Assessment Details panel.
By default, one payment method is shown on the list, but multiple payment methods can be added to the panel.
For example, payment can be made with cash and the rest with credit card.
The Payor Information panel allows you to select the payor, if it is a party from the case.
If payor is not a party on the case, you can select Other and enter in the payors information.
Add a fee
With a case open, click + Fee/Service.
Enter the desired fee or service type.
You can continue to add fees/services by clicking + on the right side of the panel.
Once you are finished entering the fees/services, click Save Fee.

The following options are available when adding a fee:
| Field/button | Description |
|---|---|
|
Click the |
|
This populates with the current date and is the date the fee/service is added. |
|
Set this to the date the fee is due by. |
|
Use the |
|
Set the number of fees/services to add. |
|
Set a single amount for the fee/service. |
|
Shows the calculated total ( |
Save Fee |
Click to save the added fees/services. |
|
Click |
Take a payment
Payments are made in the Cash Receipts screen.
If a case is not loaded into the screen, search for a case to take payment for.
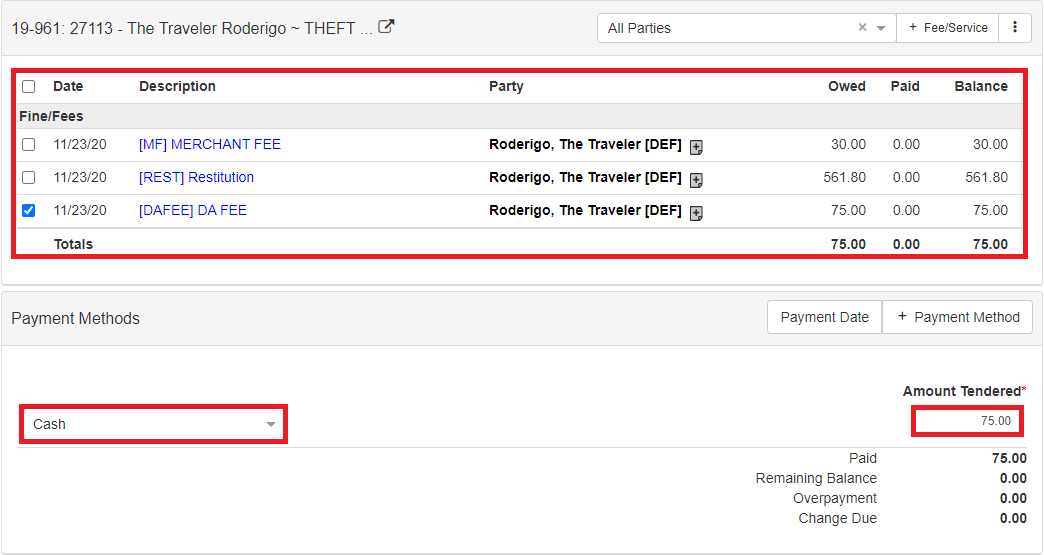
Once the cases are loaded, the open invoices for the cases you are accessing are shown. By default, all open invoices are selected for taking a payment. If you need to apply the payment to a single invoice, deselect the other invoices that should not be part of the payment. After making the desired invoice selections, select the payment method to use for the payment and enter the amount tendered.
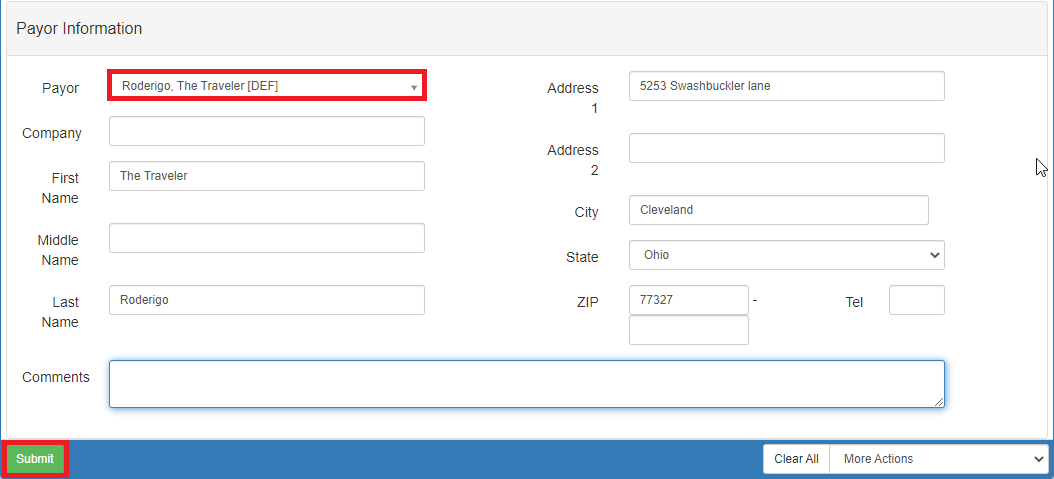
Next, fill in the Payor Information.
If a party on the case is making the payment, you can select them from the Payor dropdown.
Otherwise, select Other and enter the payor information.
After selecting the Payor, click Submit at the bottom of the panel.
If the invoice is paid in full, it no longer shows on the Cash Receipts screen and a printable receipt is shown.
The receipt can be reprinted from the Case Ledger screen.
Use multiple payment methods
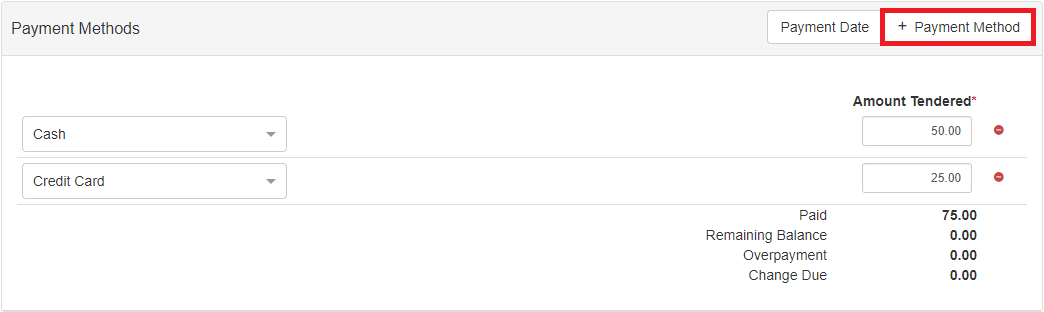
When processing payments on a transaction, you can use multiple payment methods at once. For example, pay half with cash, and the other half with check. There is no limit to the payment methods that can be added to a transaction.
Add an extra payment method to the panel and enter the information as you would for a single payment method.
When using multiple payment methods, the Payor Information is applied to each of the payment methods.
If the Payor Information needs to be different for each transaction, each payment should be taken individually using the partial pay method.
|