Calendar administration
Holiday calendar
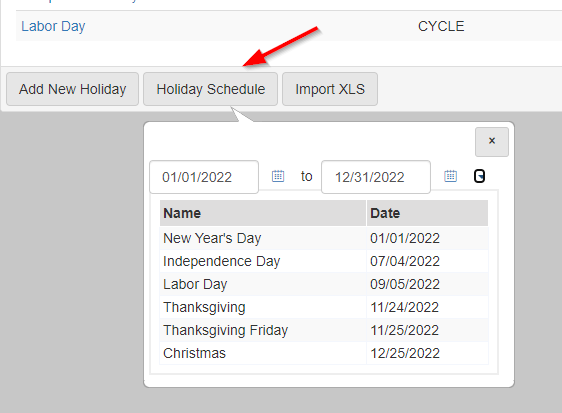
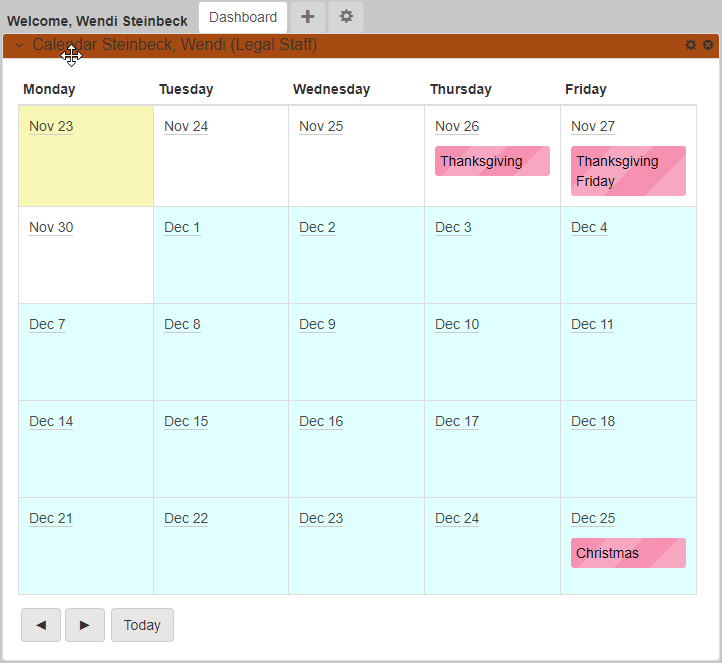
The holiday calendar is used to setup recurring holidays that your agency observes. These holidays show on calendars in eProsecutor Online, and aid you in scheduling.
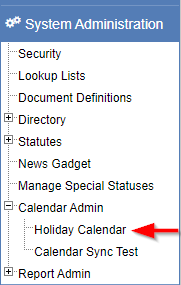
You can get to the Holiday Calendar by going to .
After clicking the Holiday Calendar link, Holidays Administration page shows.
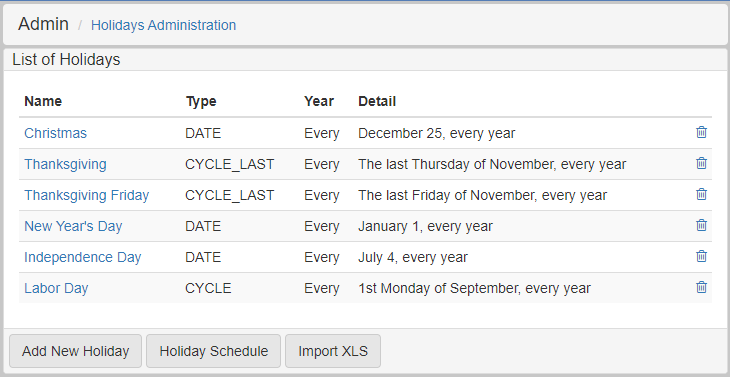
This screen list all the holidays that are currently configured in the system. If you would like to add more holidays, there are two ways: manually or using import.
Manual addition and editing
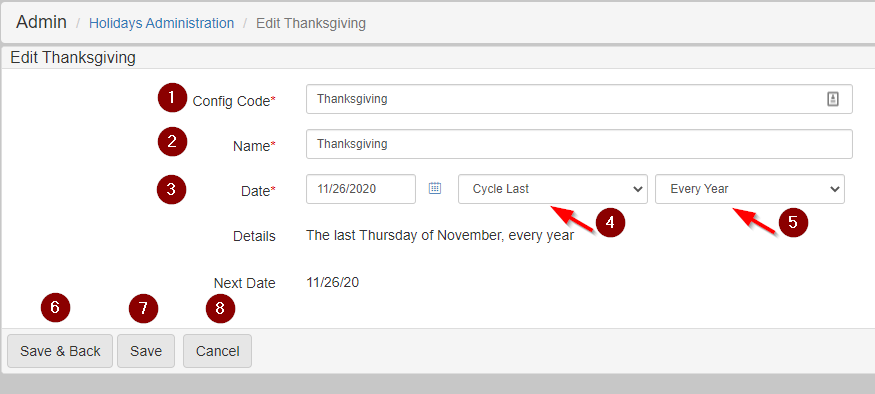
To add a new holiday, click Add New Holiday at the bottom of the screen. To edit an existing holiday, click the holiday name:
-
Config Code: System code used to identify the holiday. -
Name: The name used for the holiday that shows on the calendars. -
Date: The date the holiday occurs this year. -
Type: There are three options:Date,Cycle, andCycle Last.-
Date: The holiday occurs on the day entered in the date field (example: Christmas is on December 25 every year). -
Cycle: The holiday occurs every year on the same weekday from the start of the month (example: Labor day is the first Monday of September). -
Cycle Last: The holiday occurs every year on the last occurrence of a weekday in a month (example: Thanksgiving is the last Thursday of November).
-
-
Recurrence: Set it toThis Yearfor the holiday to only occur once. Set is toEvery Yearfor the holiday to show every year. -
Save & Back: Saves the current settings and returns you to the Holidays Administration page.
-
Save: Saves the current settings, but keeps you on the Holiday Settings page.
-
Cancel: Discards the changes and returns you to the Holidays Administration page.
Import holidays
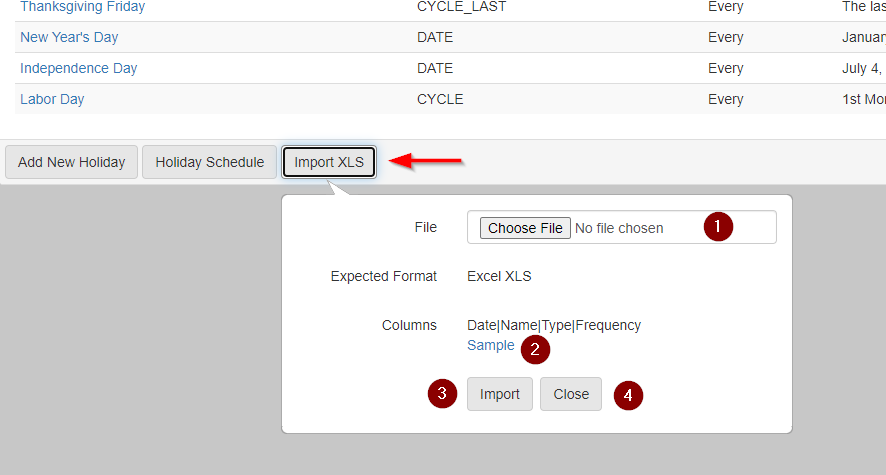
On the Holidays Administration page, you can import holidays from an Excel XLS file by clicking Import XLS at the bottom of the page.
-
File: Choose an Excel XLS file in the proper format that has holiday data you want to import into eProsecutor Online. -
Sample: Download a sample Excel XLS file that has the expected format and a few samples. -
Import: Import the holidays from the file into eProsecutor Online.
-
Close: Close the Import dialog.
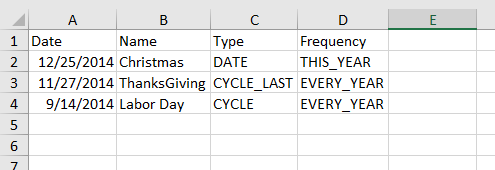
After clicking Import, the new holidays show up in the list.
Calendar sync
The calendar sync function allows events to be synchronized from eProsecutor Online to calendars.
| Users must be assigned to events so the calendar sync can send the event to their email account. |
General settings

In this tab, you can:
-
Use the
Events to Syncdropdown to select one or more events types to sync. -
Use the
Set reminder minutes before startfield to configure when a reminder should be sent before the calendar sync starts. -
Use the
Set reminder for eventsto send a notification before the calendar sync starts.
Microsoft Exchange
Azure setup
-
Go to the Azure App registrations page.
-
Click New Registration.
The
Register an applicationscreen shows: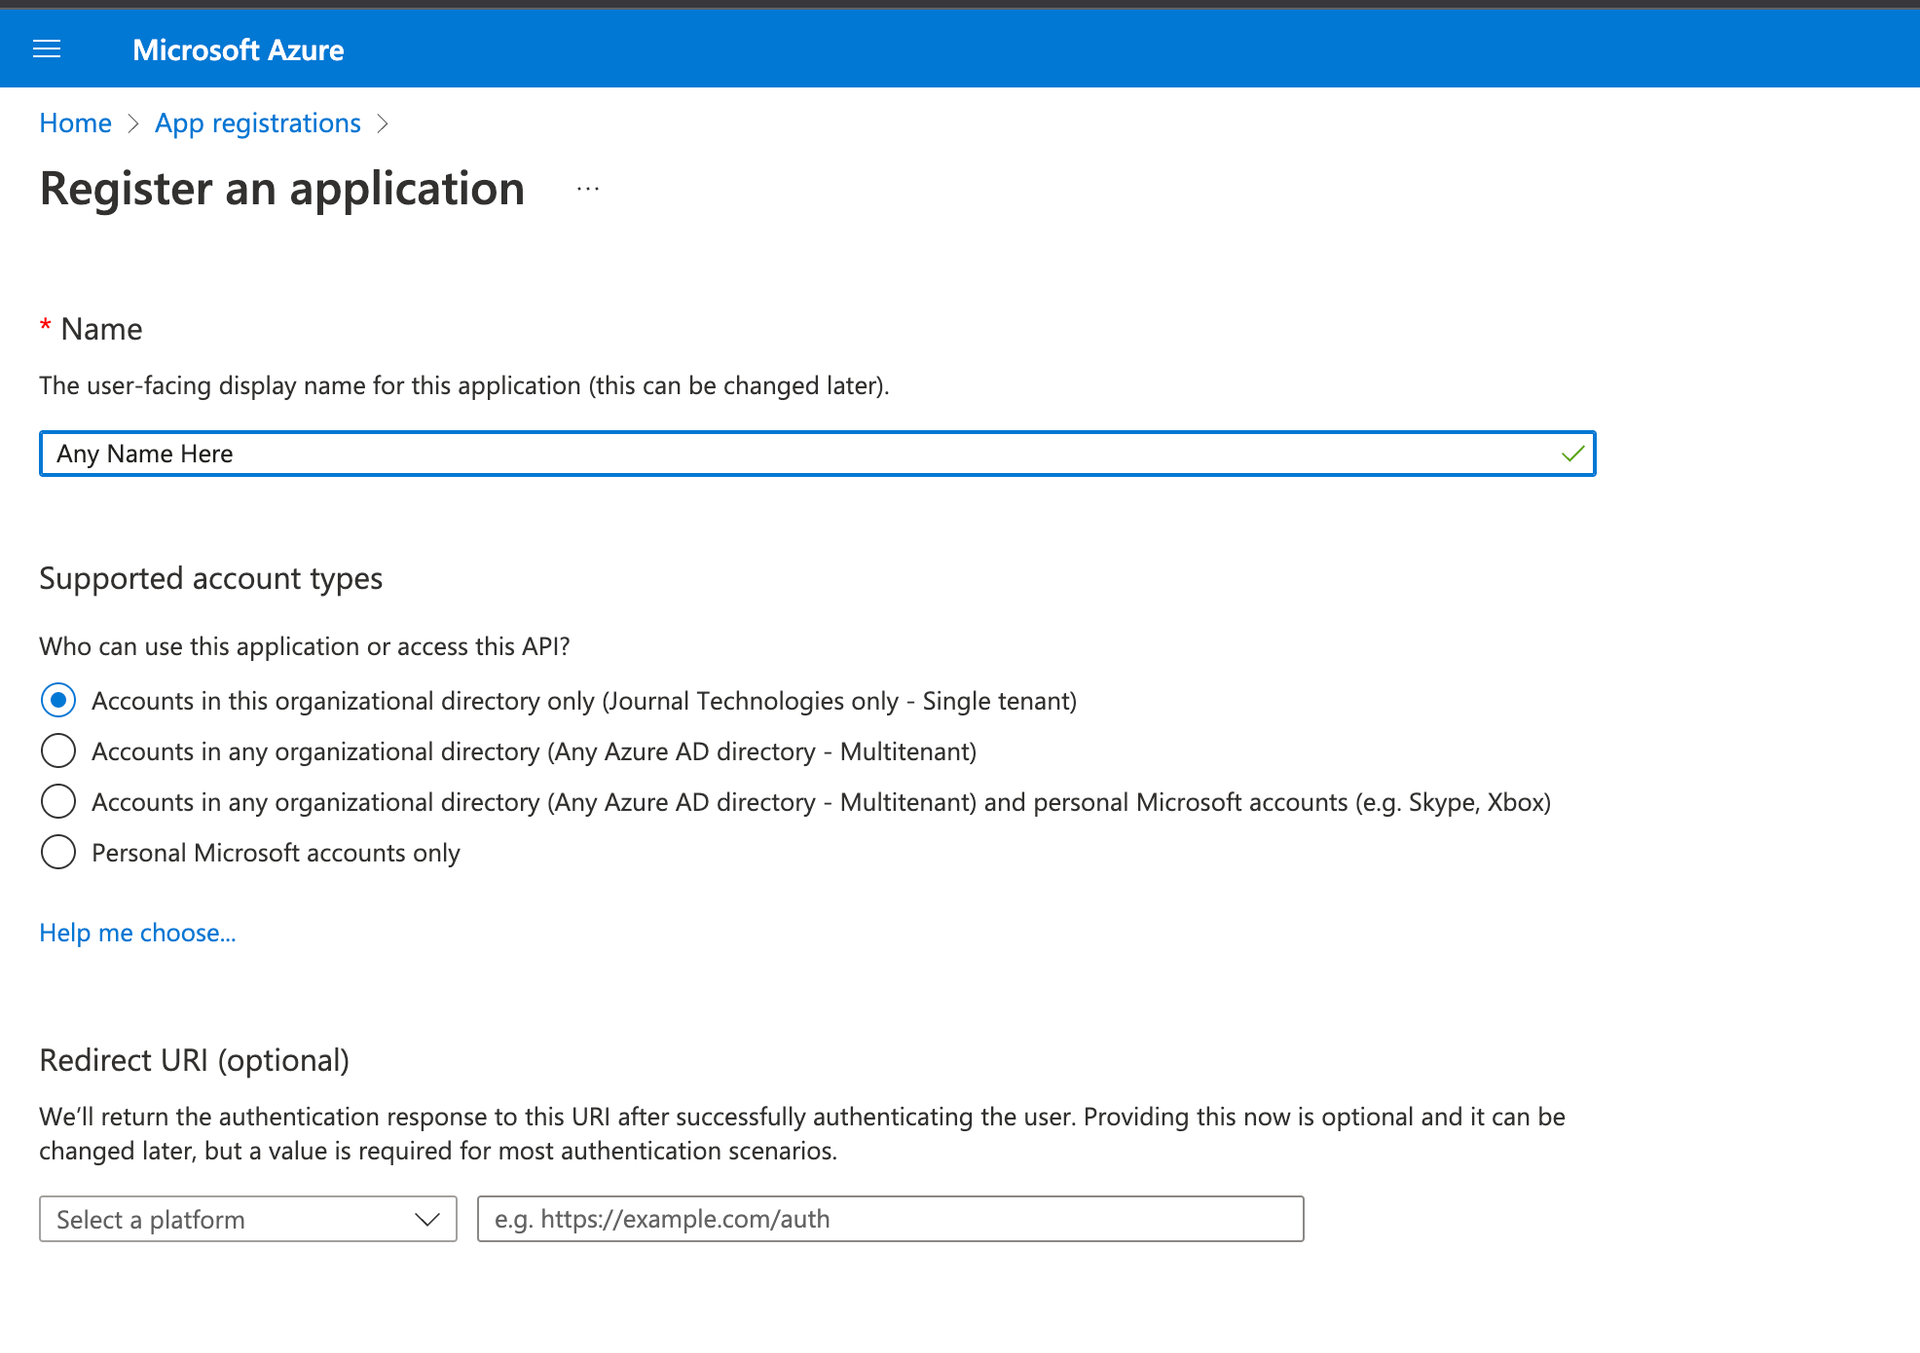
-
In the
Namefield, enter an app name. -
In the
Supported account typesfield, selectAccounts in this organizational directory only (Journal Technologies only - Single tenant). -
Click Register.
The app overview shows.
-
Record the two values from the
Essentialsarea:
-
The value of the
Application (client) IDfield. -
The value of the
Directory (tenant) IDfield.
Do not use the example values in the screenshot. -
-
Click
API permissionsin the left menu.The
API permissionsscreen shows: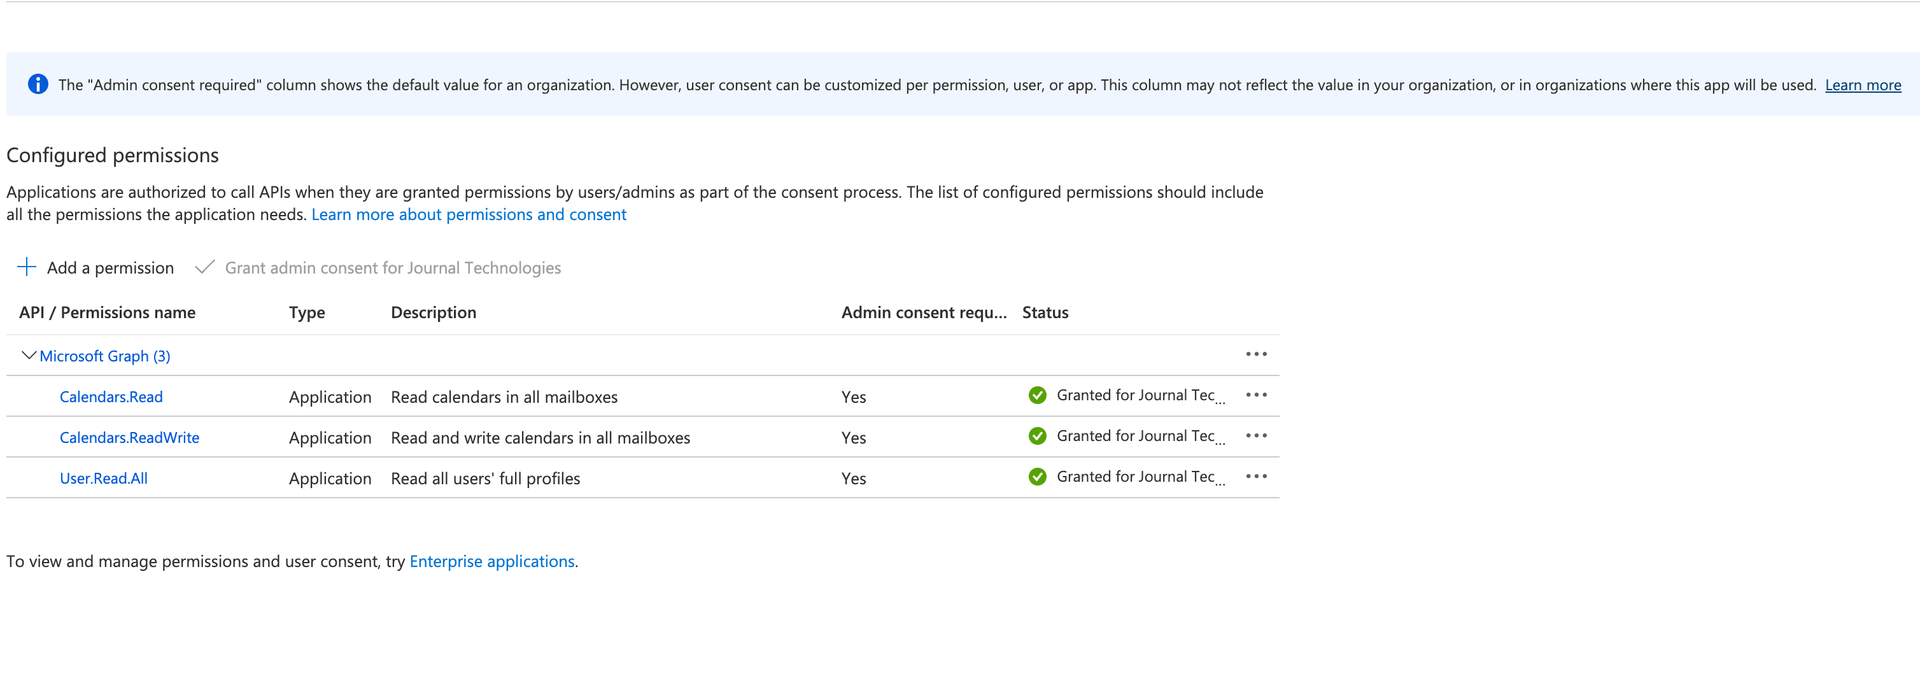
-
Verify that you have the permissions and
admin consentshown in the screenshot.Must have Admin Consentand the permissions in theTypecolumn must be set toApplication. -
Click
Certificates & secretsin the left menu. -
Click New client secret.
-
In the
Descriptionfield, enter a description. -
In the
Expiresfield, select an expiration interval. -
Click Add.
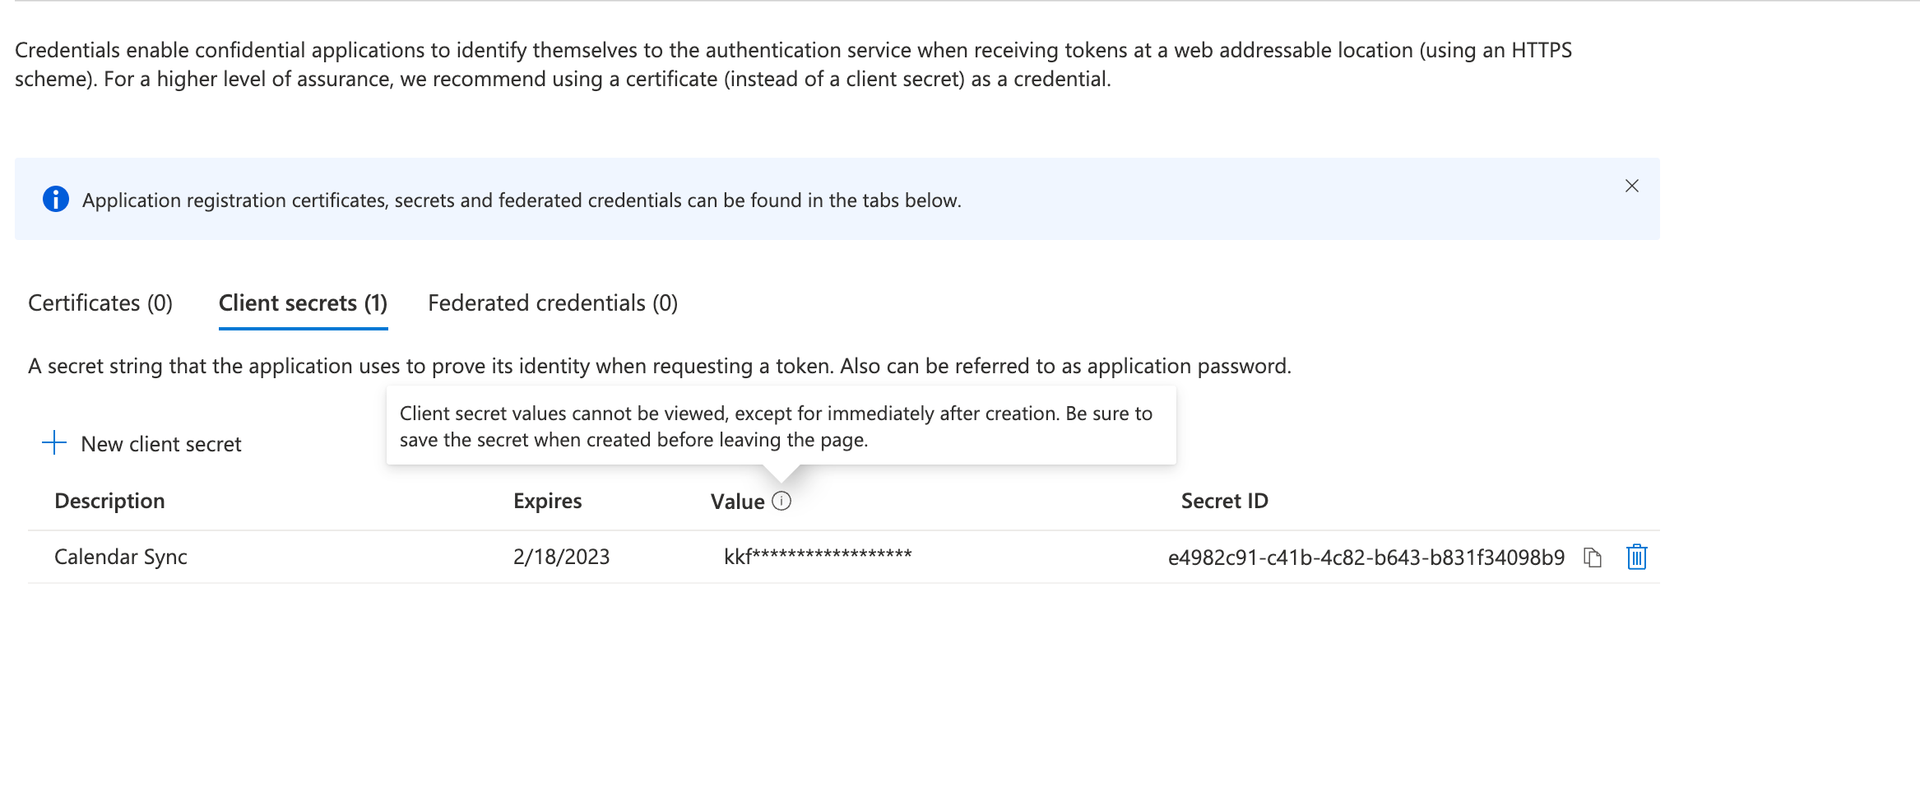
-
Record the client secret.
eProsecutor Online setup
-
In the
Search Forfield, entercalendar.sync.enable.oauth.2. -
Click the
calendar.sync.enable.oauth.2link.The
Edit: calendar.sync.enable.oauth.2dialog shows:
-
Navigate to .
-
Click the
Exchange Calendar Synctab. -
In the
Application Namefield, enter a name.
In the Client Id field, enter the Application (client) ID value from the Azure setup.
In the Tenant Id field, enter the Directory (tenant) ID value from the Azure setup.
-
In the
Application Codefield, enter an identifying code. -
In the
Client Secretfield, enter the client secret from the Azure setup. -
Select
Enable Microsoft Exchange Calendar Sync. -
Click Submit.
Create a project
-
Visit Create Google Cloud project and follow the procedure.
-
Go to the Google Cloud Console.
-
Select your project.
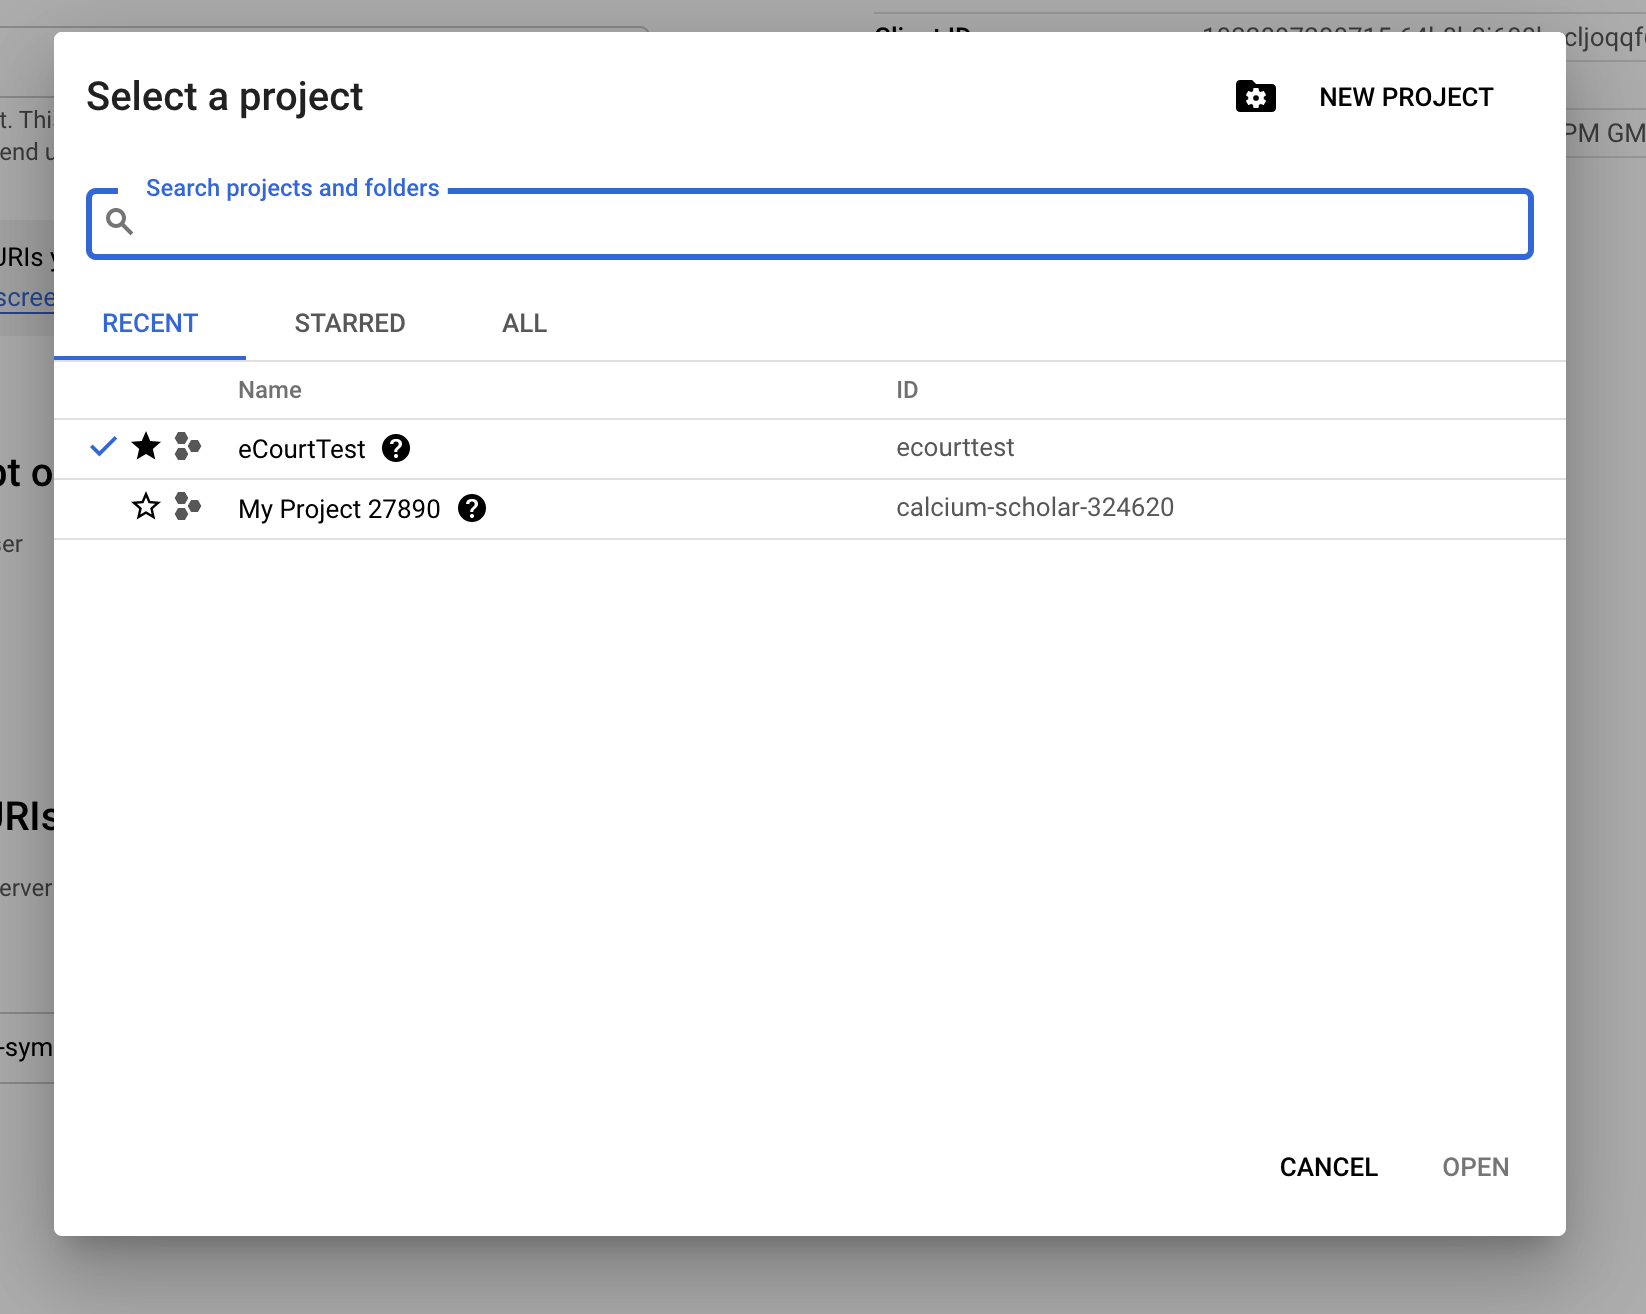
-
Navigate to
Hamburger menu, APIs & Services.The
Google API Managerscreen shows: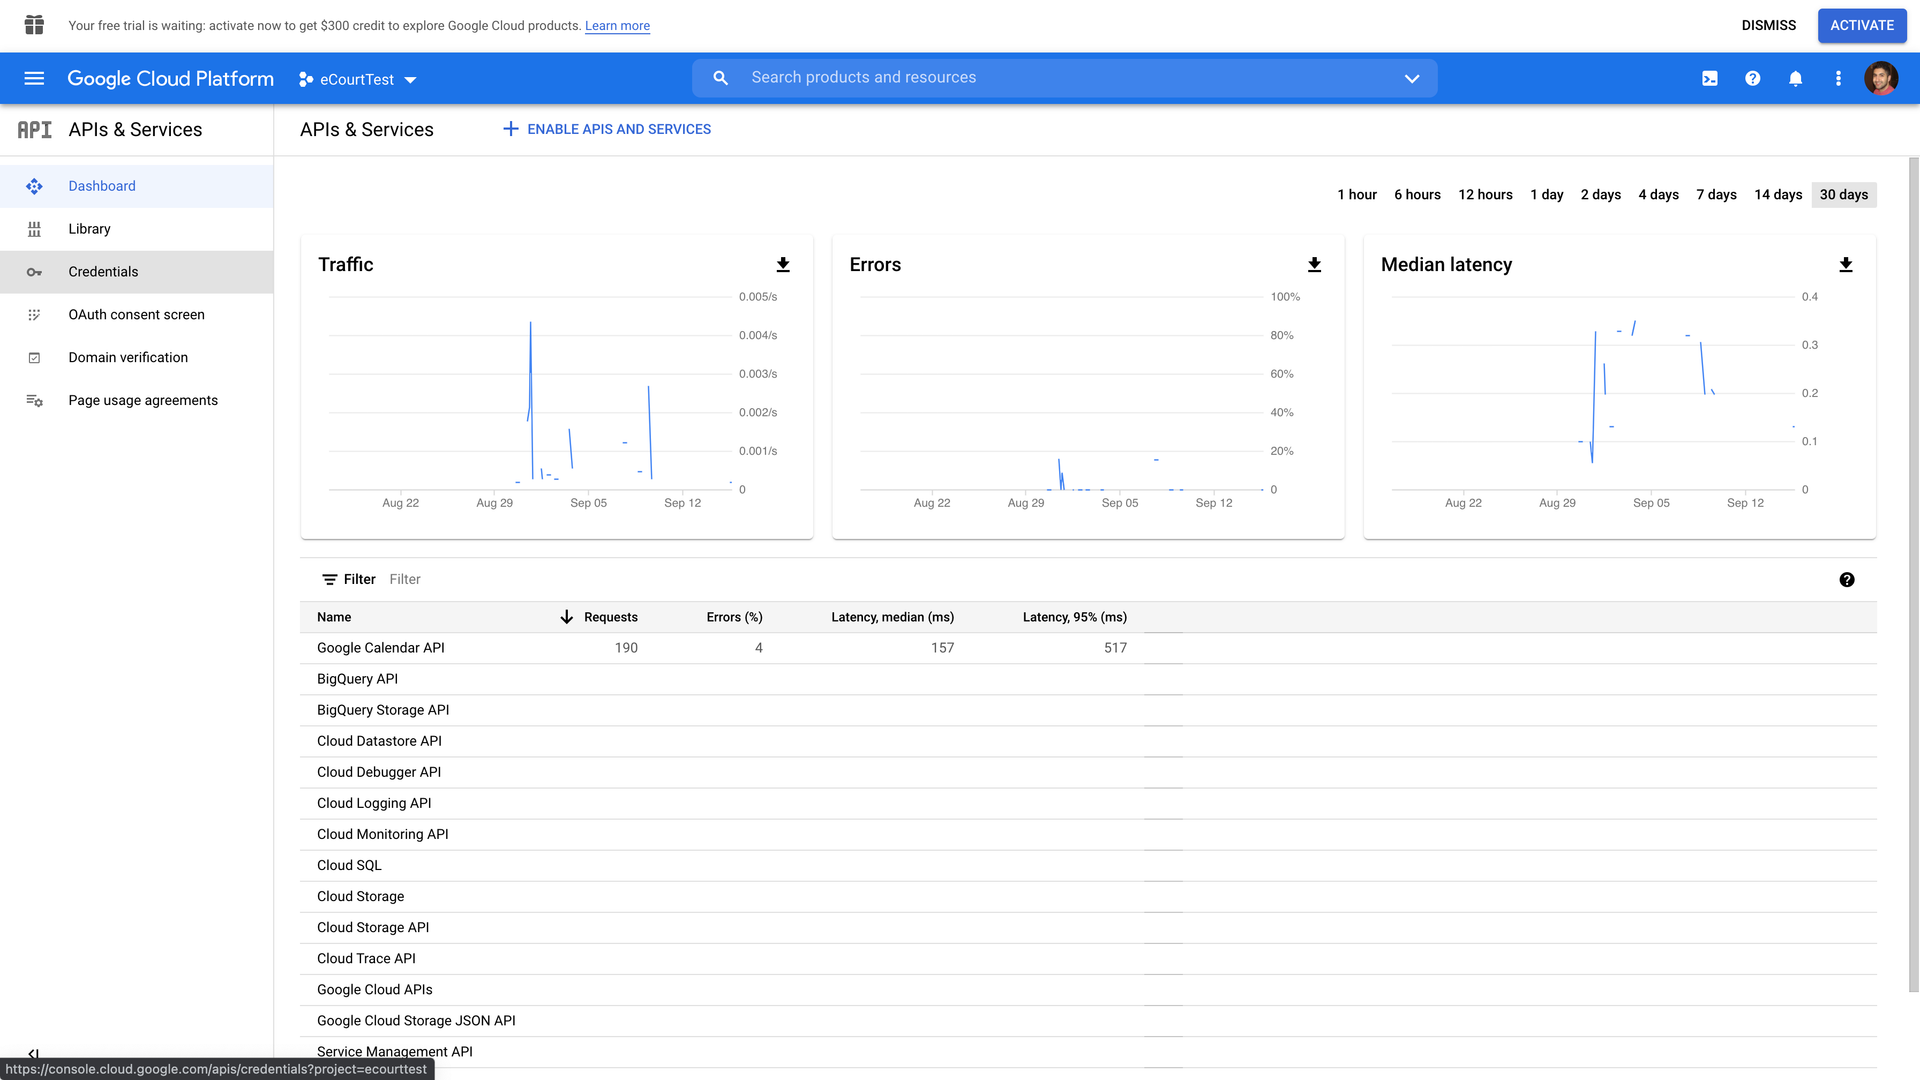
-
In the left menu, click
Enabled APIs & services. -
Click
+ Enable APIs and Services, OAuth client ID. -
In the search bar, search for
Google Calendar API. -
Click the
Google Calendar APIsearch result. -
Click Enable.
-
In the left menu, click
Credentials. -
Click
+ Create Credentials, OAuth client ID. -
In the
Application type*dropdown, selectWeb application. -
Edit the
Namefield. -
Add the
Authorized JavaScript originsandAuthorized redirect URIs.The redirect URIs should be in the format of: <eCourtPath>/ecms/userprofile?dispatch=onGetAccessToken.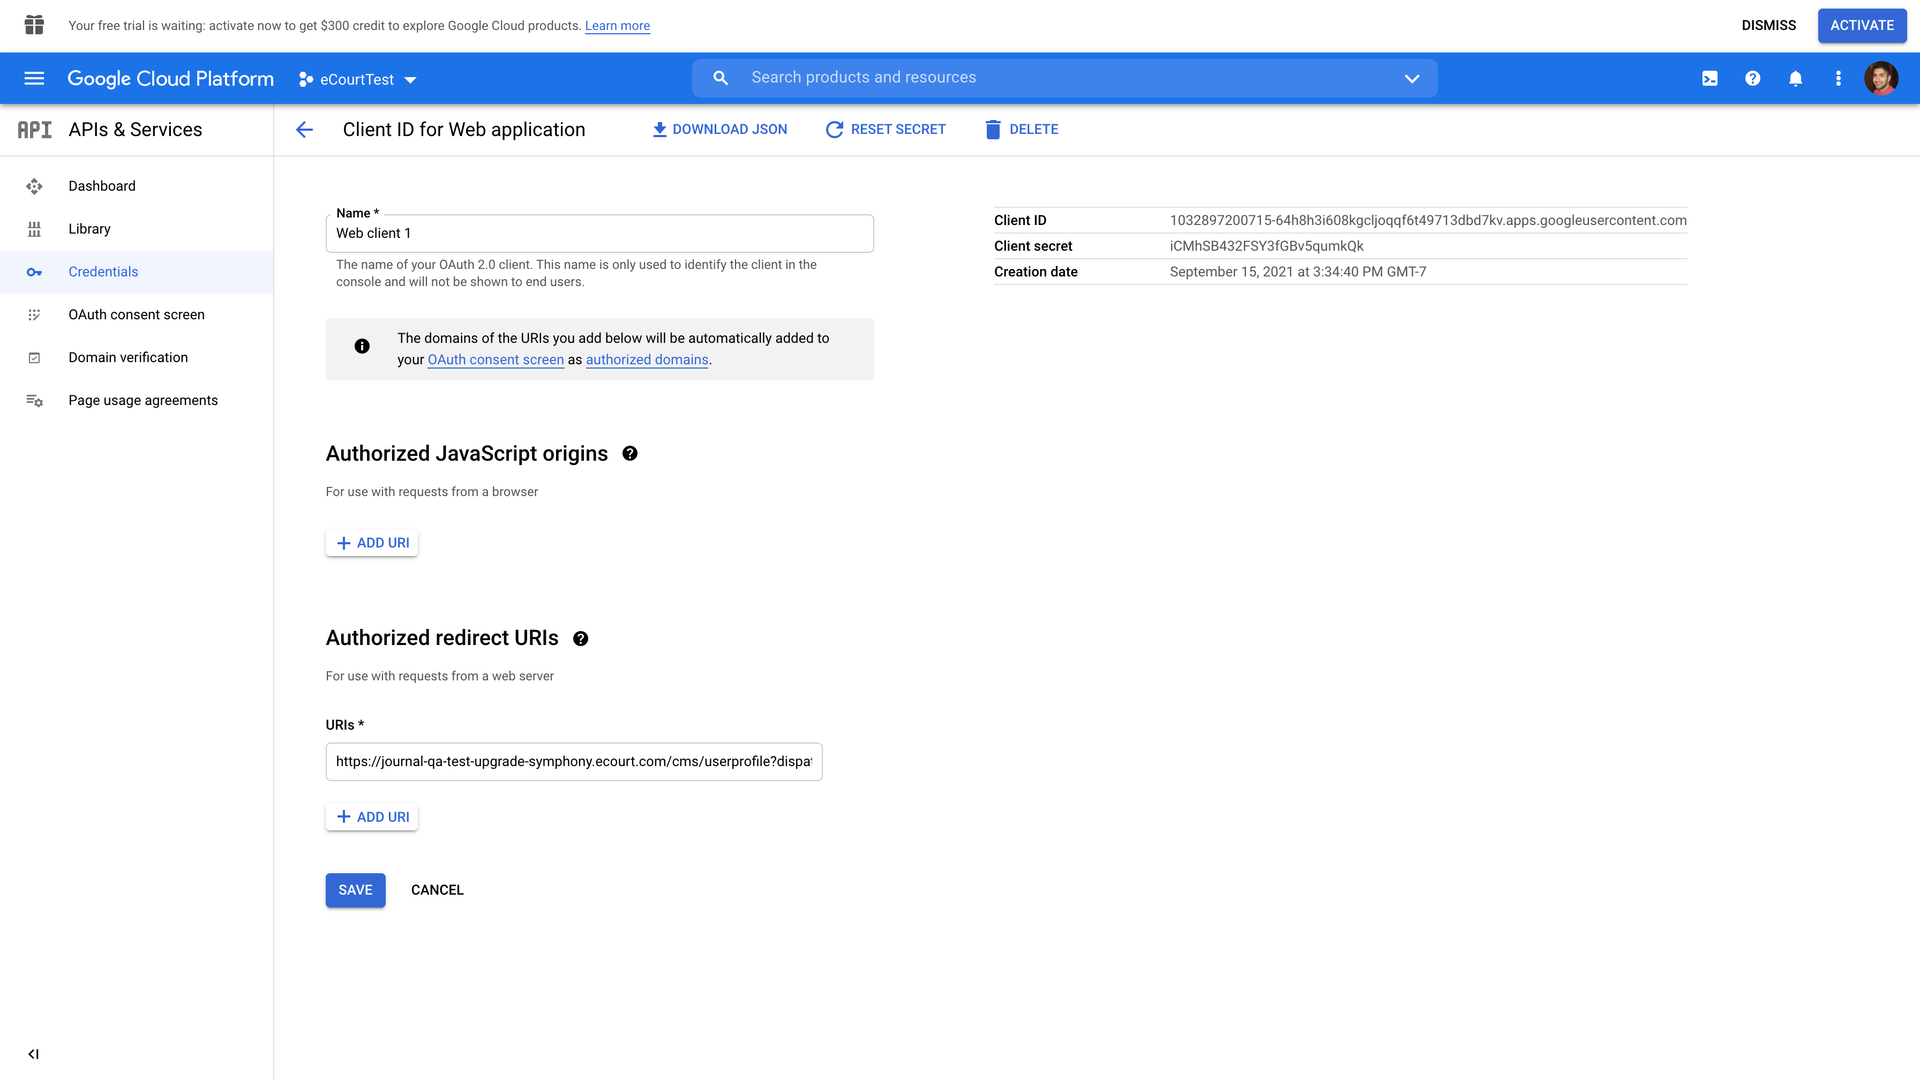
You must include the full path, for example:
https://example.com/path/to/oauth/url. -
Click Save.
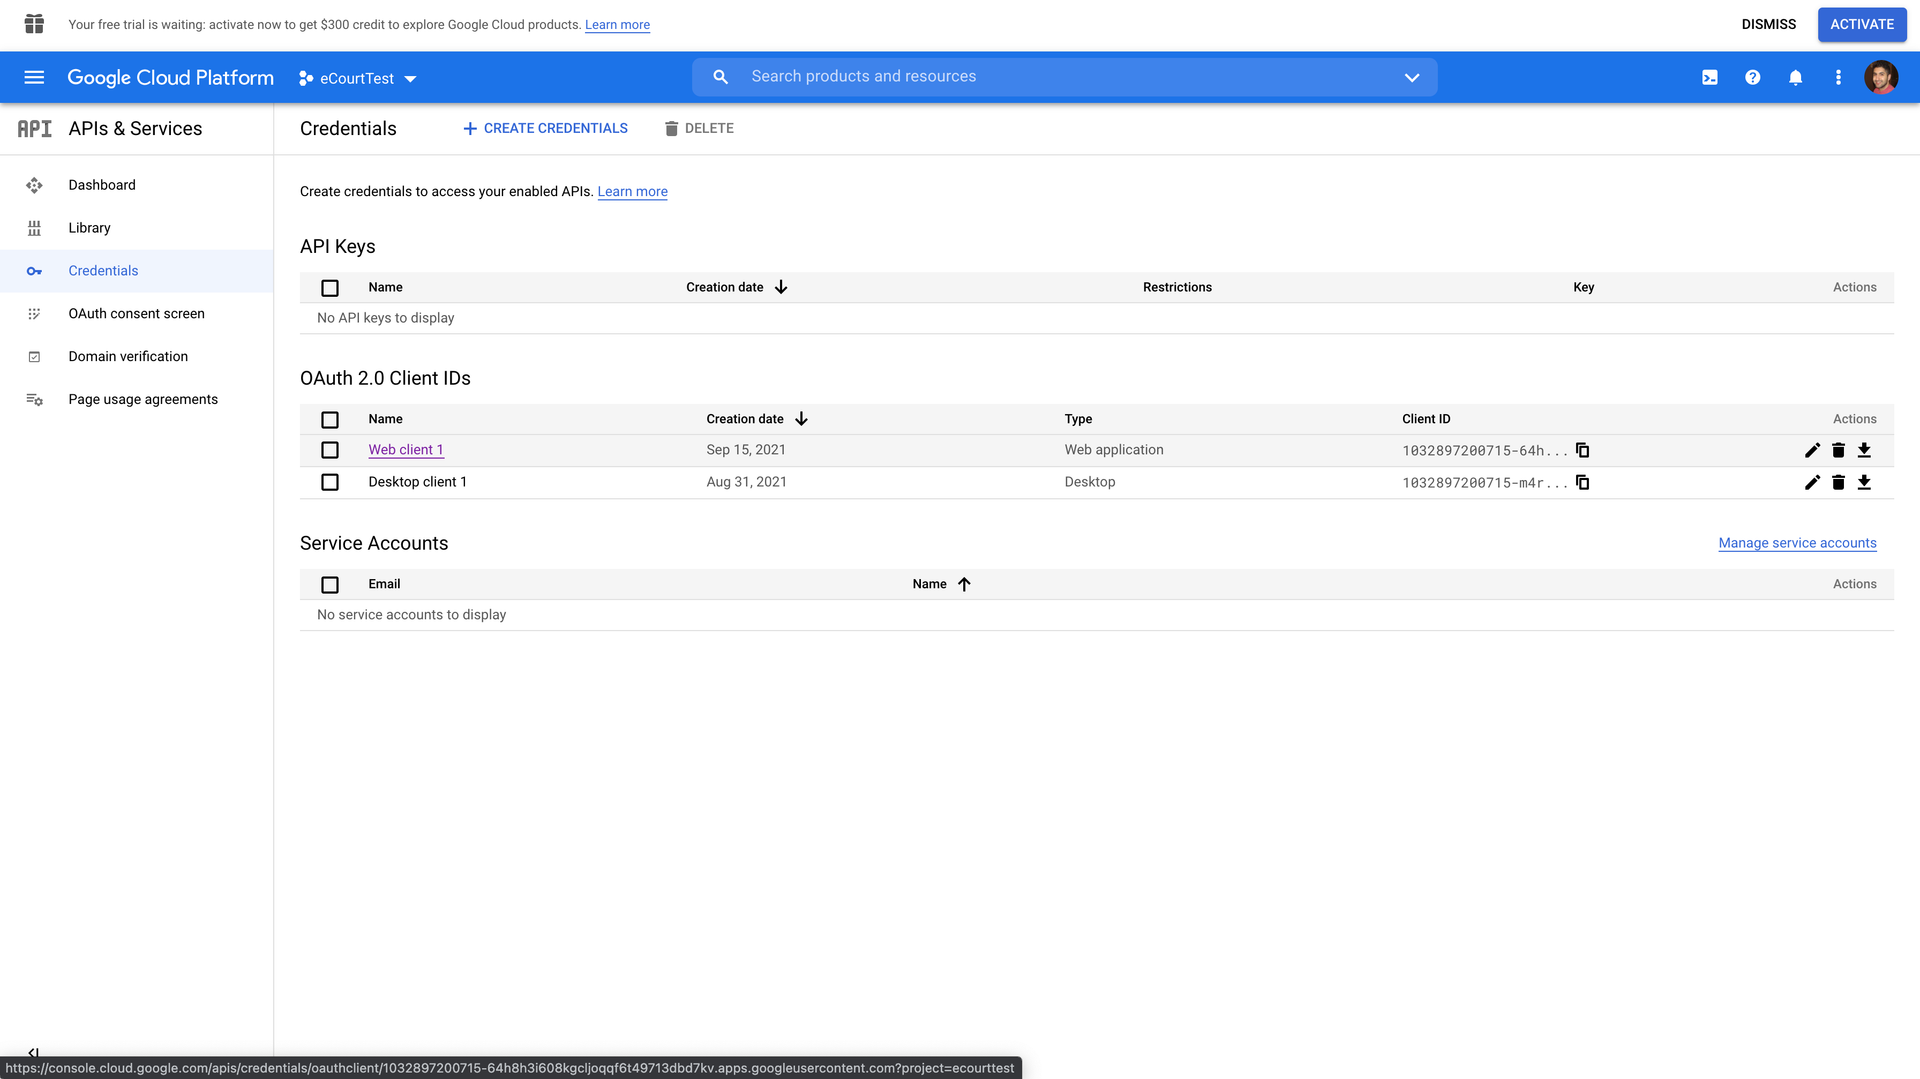
To edit an existing credential, click its link under OAuth 2.0 Client IDs on the Credentials page.
eProsecutor Online setup

-
Navigate to .
-
Open the
Google project, created in the previous section, in a new browser tab. -
Click the
Credentialscreated in the previous section. -
In the
Client Idfield, enter theClient IDvalue from the Google project. -
In the
Client Secretfield, enter theClient secretvalue from the Google project. -
Click Submit.
|
The Google Calendar Sync uses the |
Test the configuration
-
Setup Calendar sync for a user.
-
Open your Microsoft Exchange or Google calendar that you set up in the first step. A new event should show in the calendar.
Calendar sync test
The Calendar Sync Test page is used for testing how events sync to a person calendar.
Google Mail and Microsoft Exchange servers are supported.
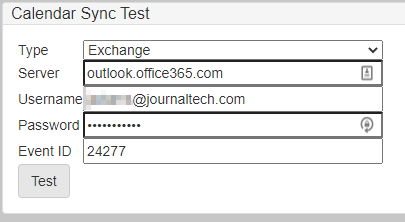
To test how and event syncs to a calendar, you need to fill in the fields with the appropriate data.
-
Type: Choose Exchange or Google depending on which type of calendar you want to sync to. -
Server: Enter the server URL for the Google or Exchange server. -
Username: This is the email address for the calendar you want to sync to. -
Event ID: Enter an event id from eProsecutor Online that you want to try syncing to the calendar.
