Refunds
Navigate to refunds
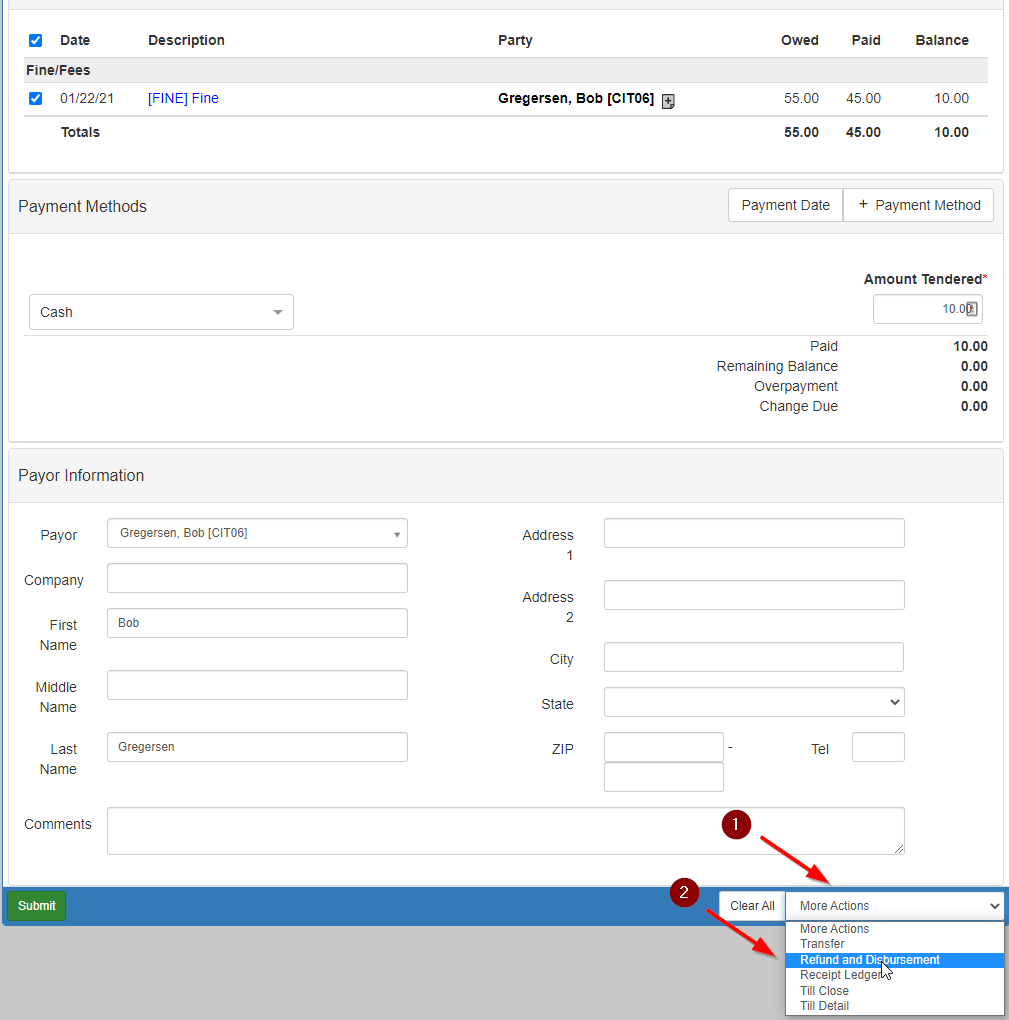
Refunds can be accessed from the Cash Receipts page.
Once on the Cash Receipts page, click More Actions in the bottom right corner and select Refund and Disbursement:
Create a refund request
After selecting the Refund and Disbursement option, the Refund screen shows:
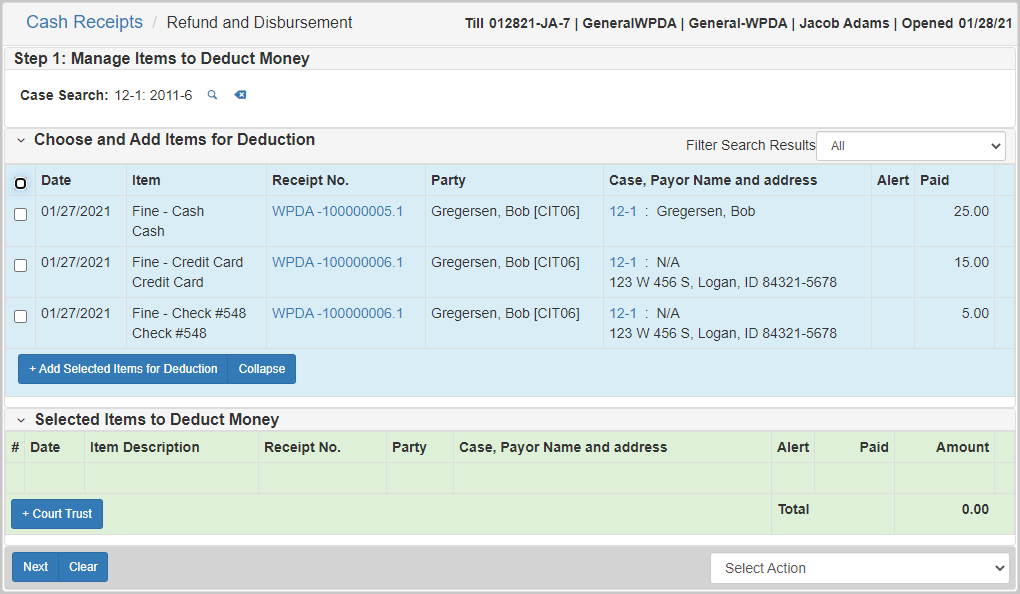
Start the refund by selecting the case payments that you would like to include in the refund. Do that by selecting the checkbox next to each payment to include.
After selecting the payments, click Add Selected Items for Deduction to add the payments to the refund request.
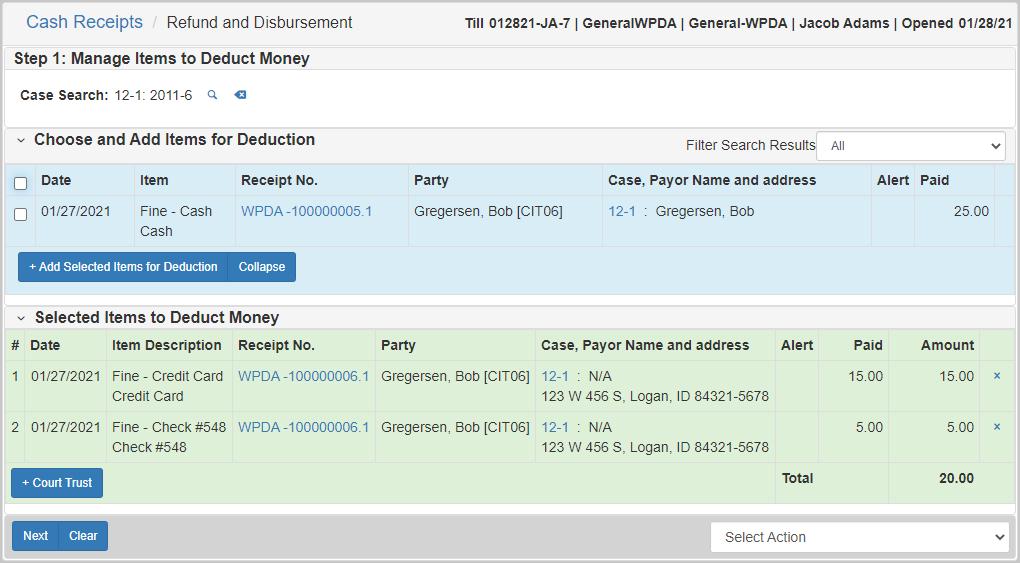
The payments are added to the Selected Items to Deduct Money section.
Review the payments and verify that everything is correct.
If everything looks good, click Next to fill in the payee information:
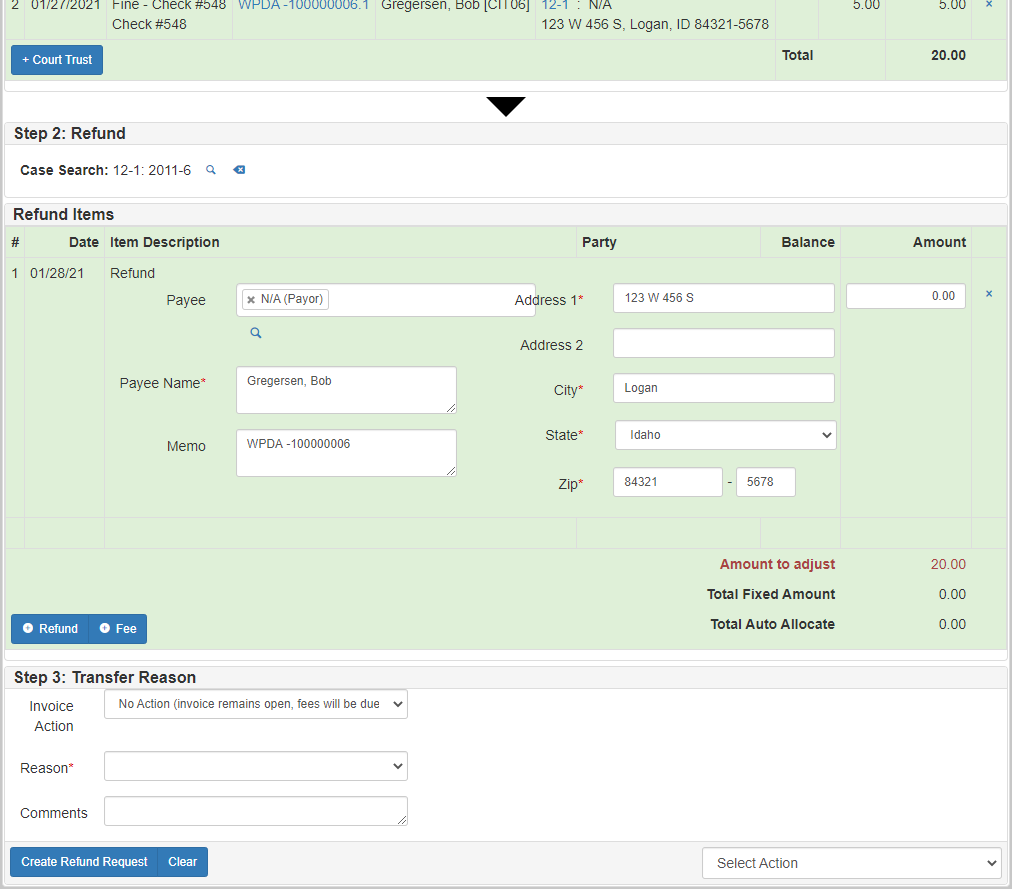
Enter the payee information.
You can select the payee from the case involvements by clicking in the Payee field and selecting the individual you would like to pay.
| You can add multiple payees by clicking Refund. |
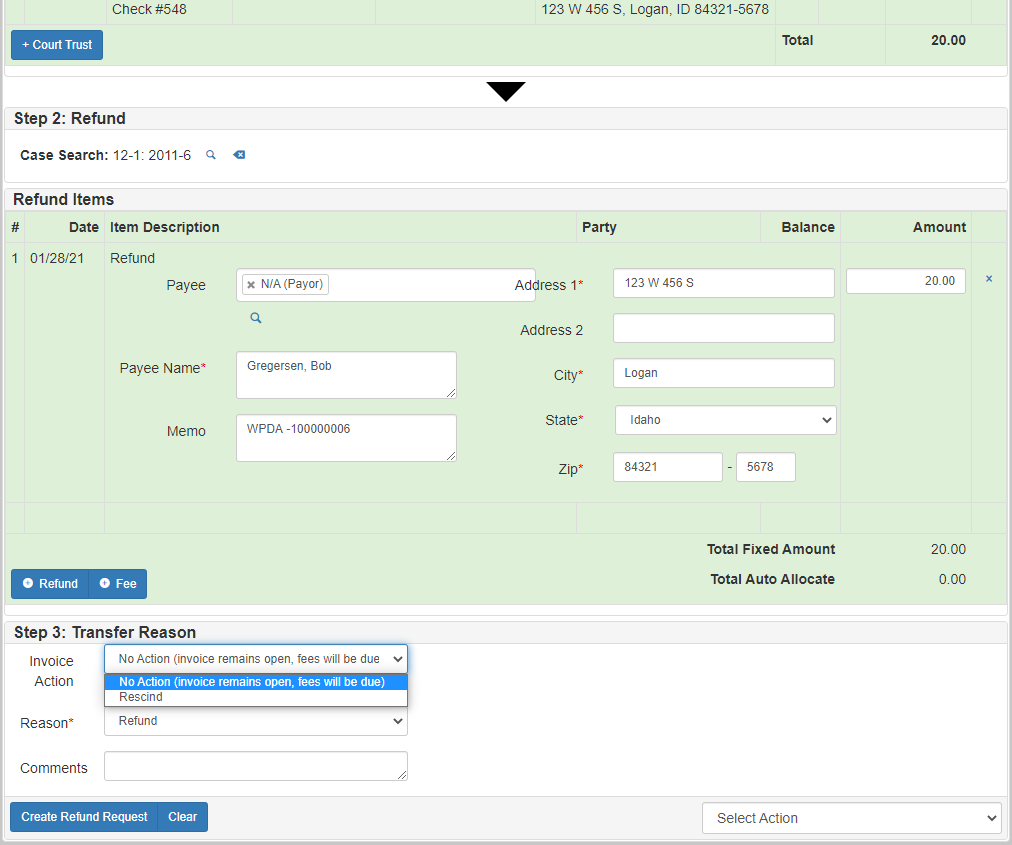
To complete the refund request, enter an invoice action (No Action or Rescind), enter the reason for the refund, and optionally add comments about the refund.
After filling in the required information, click Create Refund Request to create the refund request that somebody else must approve.
Approve a refund request
When a user creates a refund request, it must be approved by a different eAttorney user.
The user that should approve the refund request must be a member of the Financial General Workflow Role or the Financial Admin Workflow Role.
Those roles are set by an administrator.
If a refund request exists, and the user wanting to approve a request is a member of the appropriate Workflow Role, then the refund request shows on their Assignments gadget on their Dashboard.
It is labeled as Approve Refund Request:
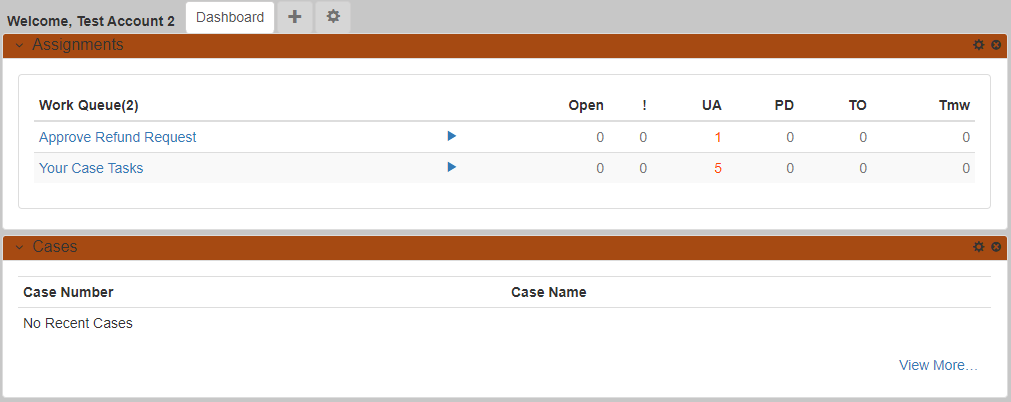
If the user clicks ▶, it assigns them the task and shows the Refund Request screen where they can approve or deny the refund request:
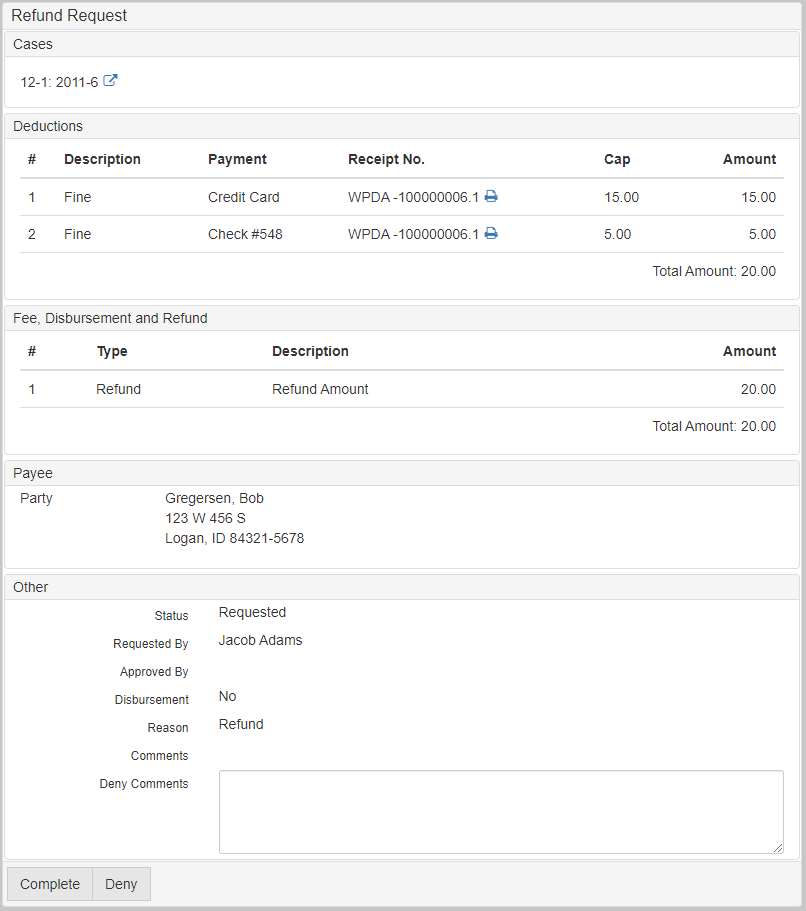
To approve the refund request, the user must click Complete.
Or, the user can choose to deny the request by adding comments to the Deny Comments field, then clicking Deny.
Once a refund request is approved, the refund can be sent to the payee.
Send a refund
After the refund request is created and approved, the refund can be sent to the individual. Typically, this is done by writing a check to the refund recipient. See Check writing for details on how to complete that task.